Photographing Cold Drinks
How do you make cold drinks look appealing? You need some condensation. And not just any condensation… condensation that holds up long enough to get your shots in.
Typically, food stylists use a mixture of glycerin and water, carefully sprayed on, to make gorgeous little beads of water. But, I don’t typically keep bottles of glycerin around in my kitchen and I certainly don’t want to drink out of a glycerin coated glass.
To stick with more common, real food, you’ll give up some flexibility in shooting as well as the look of perfectly formed droplets. But, since I strongly prefer natural food styling, I started experimenting with ways to get the best looking condensation the old fashioned way – water and a temperature change.
The basic chemistry of condensation is quite simple. Water vapour will condense onto another surface when that surface is cooler than the temperature of the water vapor (or when the water vapor equilibrium in air, i. e. saturation humidity, has been exceeded… but hopefully you won’t be in an environment that is that muggy or you’ll have some issues with your lens as well.)
The simplest way to do this is by sticking your glass (your surface) into the freezer for about 5 minutes while you set up your shot. You won’t have long with the glass once it’s at room temperature, so make sure you know what you are shooting first. It’s a good idea to take a few shots first to make sure you are happy with the composition… a glass with condensation is hard to move.
When your glass comes out of the freezer, it should immediately fog – this is water vapor attaching itself to the glass. Handle it with care, or you’ll disturb the condensation and end up without a clear side to shoot. I like to pick the glass up from one side of the rim if I’m shooting a side shot. If I need the full rim of the glass, I put it in the freezer upside down and grab it from the bottom. Move quickly and get the glass into position as soon as you can, filling it immediately. Then wait about a minute as the condensation beads. In my trial runs (with club soda and a bit of grenadine), I had about a minute to shoot before the beads turned into little running drips.
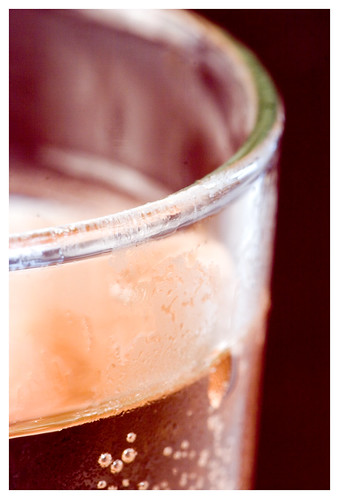
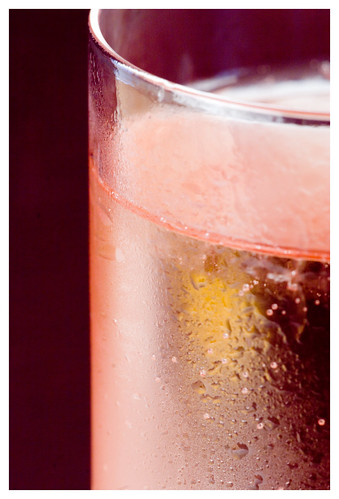
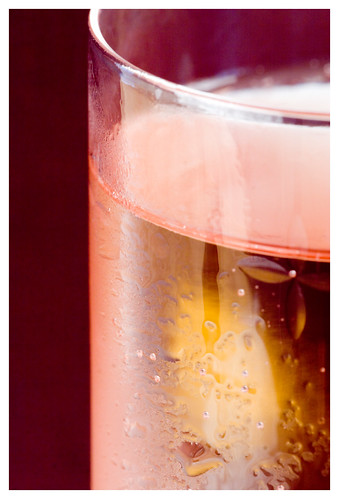
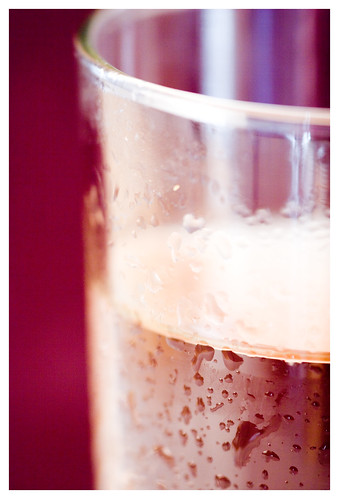
For bigger beads, try wetting the glass with water before freezing it. It will look a bit weird when it comes out, but the condensation will be more dramatic (it will also run more). You can either mist the glass, or simply wet it under the tap. I misted the first glass below, and simply let the water run in a sheet on the second. Also, the intro photo to this post was from a glass I froze wet.
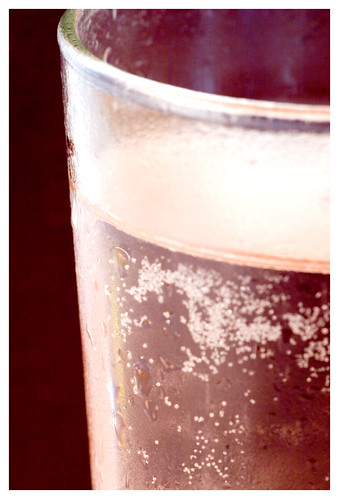
You can also try misting the glass after the fact, but the drips will almost immediately run:
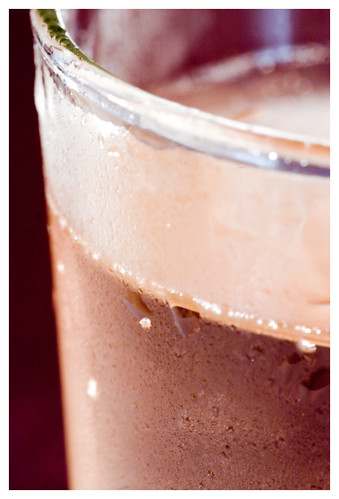
Finally, if you want a glycerin look without the special order, try adding a bit of clear oil to your water mister. I used Tea Oil, and sprayed it on a dry glass. The beads were more discreet and stayed formed for much longer without streaming down the sides of the glass. I still wouldn’t want to drink it afterwards though:
Another hint: If you want the condensation to really stand out, shoot against a darker background and focus on the surface of the glass. If you try this with a white background, you’ll have a heck of a time focusing as the beads just disappear.
Do you have other tricks? Leave them in the comments!
Technorati Tags: Food, Food Styling, Photography
You did a great job with this. I am usually fighting with these kinds of shots. Same with ice cream, quite tough, as with the temp range these days especially, you need to shoot very fast. I just did a series of ice cream shots and had to start over and over and over again!
Thanks for your tips! Mine were pretty much the same.
I have a huge dislike for artificial tricks when it comes to my photography, but sometimes it’s unavoidable. Here’s a VERY interesting trick that will create condensation on a glass that doesn’t require refrigeration and will keep the droplets in place for quite some time. In fact it’s pretty freaky!
1. Spray a clean glass carefully and lightly with Scotch Guard, the upholstery fabric protector.
Let it dry completely.
2. Once dry mist the entire glass with clear water from a small spray bottle. The water will immediately bead up.
3. Carefully pour your drink into the glass and it will appear to have condensation for a good while.
Cool. thanks for the tip, although I think that, like the glycerin, I wouldn’t want to drink out of that glass anymore either
And you are right, sometimes you do have to fake it. In fact, I have my fake ice on it’s way right now…
Loved the tips!
I can’t believe that food shots aren’t 100% real Those crazy photographers…
hi there!
a good way to replace glycerin is sugar. Just make a sugar syrup, not too dense and spray it over.
I often use syringe to put drops on “strategic” places…
I take some photos of food and wine for my website, especially when I’m writing about food and wine pairings, and it’s really hard. I use a sort of small digital camera of course, and the lighting and shadows, learning how close I can get, using flash or not, I probably have a success rate of 1 in 20 shots. Well, maybe that’s OK, I don’t know. But I’m happy to find this site by way of a link through another link and maybe another, and I’ll use it often. Thanks.
Jack – LOL
N1x0n – Cool. I’ll have to try that… sounds kind of like my oil trick, but I’d probably still drink out of it (albeit with sticky hands)
Fredric – It’s hard to shoot wine well without fairly controlled lighting… I took a look, and I think you’ve done a pretty good job with limited gear! Glad you stopped in!
If you feel like spending $16US, Evian makes an aerosol spray can of spring water. I have used it to make condensation on occasion, and it is much more convincing than glycerin (very fine mist as opposed to large drops). Rickies, a chain of beauty supply stores here in NYC, sells them in two sizes. I buy the large one, since I use them often.
Brian
Does anyone know where to get fake ice cubes in Australia?
You can get fake ice cubes from http://www.trengovestudios.com/ice/f-ice.html . I was looking for a way to make a glass bottle look frosted and found this site – which is really well designed and informative. Thanks!
i like your idea. but need guidelines about the lighting for glass shoot with drinks.
Have a look at the book “Light, Science and Magic” Fil Hunte & Paul Fuqua, Focal Press, 1997
It will tell you all you need to know about controlling that lighting, and many other common surfaces – chrome, texture etc.
Does anyone have a recipe for fake ice cream which can be used while taking photographs?
Have a look at Lou Manna’s book “Digital Food photography”. It has lots of food photography secrets including using food coloured mash potato
instead of ice cream.
What great tips! I have a drink shoot today for great restaurant and I want to make their martinis look as good as they taste.
Thanks for sharing.
Great Tips! I have used an airbrush to get the drops just where I want them too. Nice Post.
Special order? USP-grade (ultra-pure) glycerine should be available at any reasonably-sized drugstore/chemist’s. It’s usually kept alongside the rubbing alcohol and witch hazel and such. (Yes, photo prop shops sell it as well, but that’s for convenience. It’s mostly used to keep salves and ointments moist by holding water and as a food additive, again to hold moisture and to keep sugary things from becoming brittle.) Glycerine is probably safer to consume than most of the food you eat (including fresh fruits and veggies, as well as the water you won’t drink out of the glycerine-coated glass — unless that’s double-distilled and deionized). And it’s also used in photography as artificial perspiration and artificial tears (but for the sake of the model, please, please warm it up to at least body temperature before spraying anyone with it).