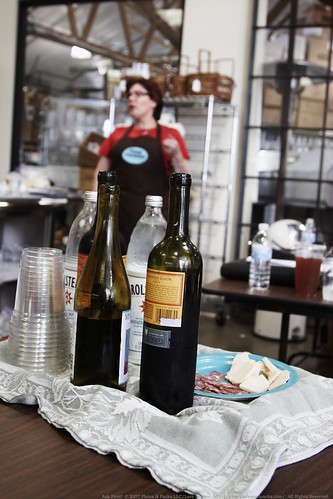
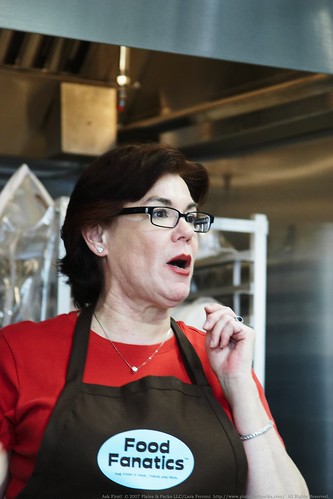
Food Fanatics Master Food Styling Workshop, Los Angeles

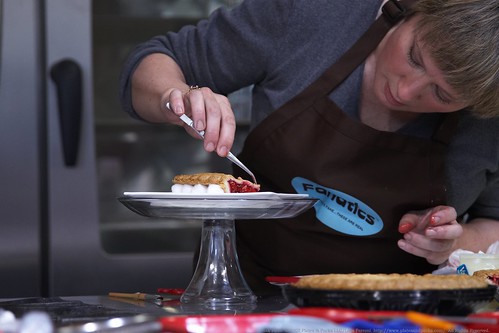
How many people do you know that drive around LA with dead scorpions and a buckets of paella in their cars? If you know a professional food stylist, chances are, you just might know at least one. Last weekend, I got to sit in on Food Fanatics‘ Master Food Styling class, a great hands-on class by two professional food stylists, Denise Vivaldo and Cindie Flannagan, who have been in the business for years and years. The class was a virtual dumptruck of food styling info, from common styling techniques (which we got lots of time to practice ourselves) to thoughts on the food styling business and digital photography, to story after story of food styling challenges, mishaps and other, sometimes bawdy, adventures. I can’t remember the last time I was in a class for two full days that never bored me, but this was one of them. From the 9am start to Q&A over wine at 3 in the afternoon, the class is a non-stop riot of laughing and dirty hands. If you get a chance to spend sometime with Denise and Cindie, don’t miss it.
For starters, Denise and Cindie get it. They’ve worked through the changes in the industry, and understand how digital photography has changed the process and the budgets of companies. “In the olden days” (one of Denise’s favorite expressions) of film, an advertising shoot was lucky to get 5 shots in a day. Today, it’s not unusual to try to get 15 or 20. When you need to get that many shots in a single day, you have to know the tricks and, even more importantly, be able to think on your feet. The food that you style has to be ready pretty quickly, and has to hold up, looking fresh for hours. It isn’t the way you’d cook and shoot for your blog (unless you actually want to poison your whole family), but it is critical for success in advertising.
Cindie and Denise also know that each situation is different. Their job is to provide the best looking food for the shot, within the constraints that they are given. Sometimes that’s budgetary constraints (the client will only pay for so many turkeys) and sometimes it’s sheer practicality (artisnal mozzarella just doesn’t do pizza pulls like super-plasticky string cheese does). Sometimes they get to use the finest meats and produce available, and other times, the product, well, isn’t great. Sometimes, shots are impossible to get without significant fakery (like shooting ice cream, in the Palm Springs dessert heat), and sometimes it has to be the real-deal (you can’t fake fresh salad greens and herbs).
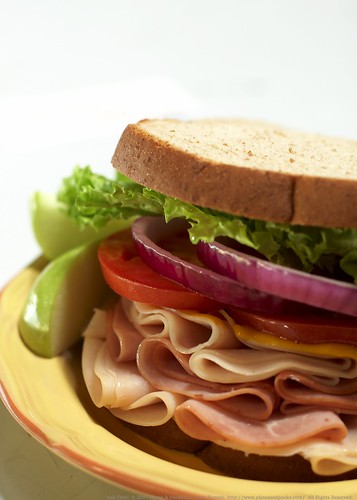
In the class, we got to style our own chickens, sandwiches, hamburgers, salads, pasta and ice cream, as well as learn how to do pizza pulls (a single piece of pizza coming out of a pie with all the cheese still attached) and beer/cocktails.
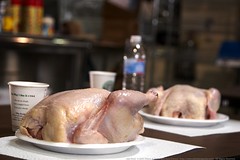
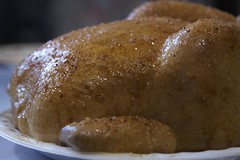
The chickens had to be one of the most fascinating parts… you go from a raw bird to a fully styled one in less than 30 minutes, with most of that time being spent on coloring the bird after it cooks for it’s zippy 10 minutes, just enough to “puff up.” Then, it’s lots of Pam (for the shine) and Kitchen Bouquet for the golden sheen, and a bit of seasoning salt for texture and you are done. Of course, the bird is completely toxic… but it does look good on camera.
Here are a few more tricks I learned along the way:
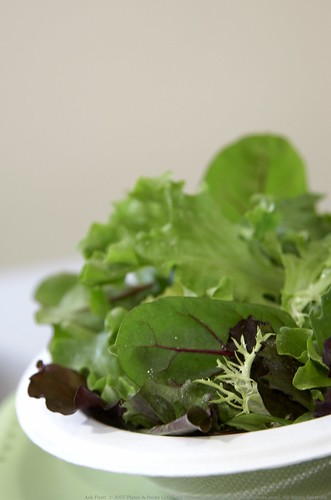
Salad greens and herbs will stay fresher longer, and may even come back to life a bit, if you float them in a bath of ice water. Also, wrap fresh herbs in wet, cold paper towels and store them in the fridge as soon as you get them back from the market until you need to use them to keep them from wilting.
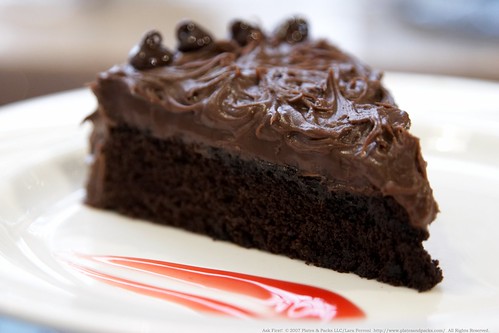
A great looking, messy-look for frosting is really easy with a skewer. Simply swirl the frosting (on the cake) in little figure-eight patterns all over.

Stuff bathed in sauces doesn’t look very good in photos. For pasta and salad, your sauce or dressing should be used sparingly. Red sauce is best put on and then gently rubbed off.
A bit of freshly grated cheese or ground parmesan is a great way to add some texture to creamy dishes that just lie there… like hummus or refried beans. Also, try the same figure-eight pattern with a skewer to create places for light and shadow to fall.
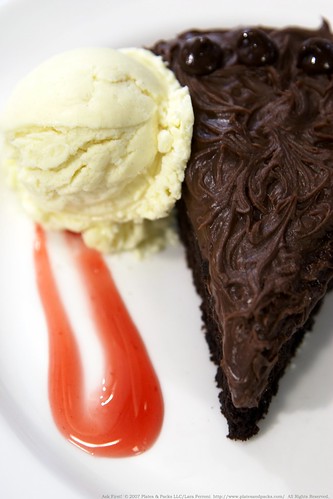
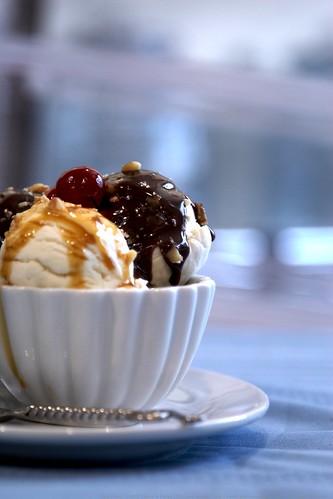
Real ice cream is great if you can shoot in about 3 minutes. It’s best to scoop the real ice cream into balls and then refreeze them before shooting. A metal baking tray works great for this. Just scoop until you get some that you are happy with… a nice crown and a nice apron, and then set them down on the tray. Cover and freeze for at least an hour. This is a great tip for pre-making ice cream desserts too if you are serving a bunch of people. If you can’t shoot that quickly, and need something that looks like ice cream, the trick is crisco and powdered sugar, mixed up for a while until it has the consistency of playdough. Heat up your ice cream scoop before scooping for the best looking texture and drizzle it with the tiniest bit of real melted ice cream in the same color.

Grill pans almost always produce great looking grill marks, so stylists don’t have to use the tricks that they used to. If, for some reason the grill marks do need to be re-inforced, they usually use an electric barbecue/coal starter.

Blow torches are very useful.
So are tweezers, cotton balls and paper towels. Also, I need to get myself one of these.
Don’t overstyle. Do the basics, and then get the food in front of the camera. Then tweak. Otherwise, you run the risk of ruining the freshness and naturalness of the shot, or might spend too much time futzing with a part of the food that won’t actually be in the shot.
Food Fanatics has a book on food styling coming out in the near future. To be notified of the publication release, send mail to dvivaldo@earthlink.net
Technorati Tags: Food, food magazine, Food Styling, Photography, Los Angeles
Thanks for this great report. Just a shame the classes were in L.A. and not in Paris. Would have loved to attended.
looks like a fun learning experience!
one quick thought: i love your photographic style, which is simple and lovely and very elegant. learning new techniques is exciting, but please don’t lose your innate aesthetic sense!
😉
I have that Oxo tool–I use it all the time but had no idea it was so important for food styling. Great post! I don’t know the first thing about making food look pretty, but this gets me headed in the right direction. Thanks for sharing!
Thanks Lara, this is a really interesting post. And thanks for sharing so generously what you have learned!
sounds like fun, and I love watching and learning from stylists. Some of them are simply amazing…
Amazing indeed. Thanks for sharing all of this with us.
Dear L, It looks like you really had a great time and learned a lot. Thank you so much for sharing it with us. So, is that ice cream up there in your photo, next to the chocolate cake? I can’t tell!
So glad everyone is enjoying the write up! There was so much more in the class, I only got to touch on a few things, or you would been reading for two days straight 🙂
You might also want to check out Fer Food’s post on the class…it was fun to run into a fellow blogger there!
Lucy – that’s the fake stuff! It does look pretty real in the photos, doesn’t it!
wow! so much to know it is a bit scaring…you are an incredibly generous AND precious source of info. Thank you : )
hey these are really good tips .Thanks …but i still have so many questions about lighting !
Fascinating and informative writeup, Lara! It must have been so interesting to witness pro food stylists in action. It seems to me, though, that many of their techniques seem geared more towards the advertisement arena than to editorial (which seems to favor a more natural and ‘imperfect’ esthetic these days). Was that your impression?
Kate – Feel free to ask away!
Melissa – yes. Most food styling is definitely focused on advertising… that’s where the majority of the money is. But this kind of styling is often used in cookbooks too, which kind of sits between advertising and editorial in its requirements. And, actually, in a lot of ways, even advertising is taking on a more editorial, ie, real/imperfect, feel. But ironically, there is a lot of work that goes in to making it look imperfect.
Personally, I like editorial work… but then, it pays so little, it’s hard to make a career out of it.
Wow, almost as good as being there! Thanks for sharing such a fun experience.
Thank you for the detailed post. Learnt a lot.
Wrap herbs in wet cold paper towel before putting into the refrigerator. I should try that with cilantro. Cilantro goes bad rather quickly on me.
p/s congrats on receiving your Thinking Blogger Award!
This is so interesting! Thanks for sharing. I’m going to be trying out figure eights in my dips and sauces now:-)
I actually work in the food packaging industry and I can give you all just this little bit of advice – if ANY client is looking for 15 – 20 shots in a day they are out of their minds or have HUGE budgets. Never have I ever seen any photo shoot go more than 6 shots in a VERY long day. Anything more than that is just unbelievably hard to pull off.
Having said that, the job also pays REALLY well once you’re experienced and known in the industry. 🙂
Thanks for the informative post, Lara. I’ll echo Ilva; it’s very generous of you to share what you have learnt!
I can’t believe that the ice cream was fake? And the grill look on meats… i always wondered how they get it so pronounced on photographs! Such a great insight.
Thanks for your advice on fresh herbs too. I shall try it next time i buy a fresh batch – they always lose their freshness so quickly.
I had been waiting for this post to come out and somehow missed it 🙂 Lovely overview and great on the site shots of the ladies, very dynamic.
I have this big food photo and styling conf at BU coming up and I cant wait.. but feeling sorta sheepish about bringing my camera.. I am such a goof.
Thanks for sharing!
Enjoyed reading about your class with Denise and Cindi. They are fun, aren’t they!
And, Nika–come say hi to me in Boston at the conference….I’ll be speaking there on “Food Styling Myths”. As a food stylist, I’m trying to style more naturally these days…..and work with fresh real food!
I’ll have to concur with Eric’s comment above; 15 shots in a day is pretty much impossible without two teams on set. Quality suffers in a big way moving this fast.
As for the chicken styling techniques: what you were shown was a high perfection technique that has very much fallen out of favour over the last decade (unless you are doing a poultry advert – even in these ads however the technique is somewhat falling out of favour). Painted birds still exist, but this is usually done in combination with at least some cooking (more than ten minutes) in order to give the birds a more natural look. The cooking can be done in the oven, or using a 500 degree paintstripper. As for colour – a combination of “paints” works best. Japanese soy, dark Chinese soy, Angostura bitters.
Great report, just wish i´ve been there, bit far to travel from sweden, maybe next time
Oh by the way, Still life with sure is addictive keep up the good work
Have you ever considered working with more modern food presentations than the ones you are using now. I see a style pattern like that of a home economics based magazine like Southern Living or something. Would you consider doing more contemporary stuff like you would find in art culinaire http://www.getartc.com/ or even on restaurant sites like wd~50 http://www.wd-50.com/ or alinea http://www.alinea-restaurant.com/ ? I think the future of food and food photography can be found in this style.
Hi chad,
I’m not sure if you are addressing the comment to me, or to the folks that run the class (who may or maynot see your comment). But, I’ll answer for myself.
The styling above isn’t exactly my typical style. That said, neither is the experimental cooking type stuff at Alienea or El Bulli. Those have their place, and are definitely intriguing, but are more about art than the enjoyment of food. My personal preference is the style of modern, easy cooking you find coming from Australia or more journalistic styles like you find in Saveur. These are the things I find more beautiful and full of life, and that is the idea that I hope to capture in my food photography. I know others who are more inspired by the experimental stuff though, and they do it beautifully. You might check out Ideas in Food for more of that type of styling.
Thanks for your comment!
-L
Thanks. I actually check out Ideas in Food everyday. Their experiments with photography have in part inspired me to better my own photographs. Like most other chefs, photography is a secondary thought and many don’t give it any thought. It’s amazing what a couple of minutes and a little thought can do to take a shot from simply being documentation to something much more presentable. We take so much time working on plate presentation, that we should also put time into making that translation onto film… or at least into megabytes. Thanks to food photographers everywhere for making us more aware. Are there any photography sites that you could recommend for the type of shots that I need help with?
Lara, your notes about our Master Food Styling
class were wonderful -I hoped I thanked you enough.
Just a note about 15-20 shots a day. For packaging or product shots – depending on the gig -they often work slowly…I don’t know why -I’ve worked with stylists -that ” want to slow down …”
But, we work with 2-3 three major food companies here on the West Coast. Yes, we sometimes run two sets, but we shoot more than 5-6 shots- without quality suffering -because that’s what the market expects. I’m telling you it’s the wave of the future.
I am so glad that you put all of that information in this entry! I have just recently started a food blog that features lactose free food and I have learned a lot already about photographing food. It is all a learning experience! I love the look of your photographs and am really happy to see that you have information on how you get the look that you do! Thanks for the information!
Oh to only have to achieve 6 shots in a day. My recent day of styling we had 14 dishes and 5 hours. I was SO exhausted at the end of the day. I had no idea that arranging food on a plate could be so tiring!