Smoothing Chocolate Chips
Chocolate chips aren’t the easiest thing in the world to shoot, particularly if they have been exposed to any temperature shifts (like sitting in a cabinet over the summer). It’s perfectly fine to eat when them if they have bloomed, particularly if you are cooking with them. However, a photo will make any blooming look even worse, especially when shot close up.
One trick often used in food styling is to brush on a bit of oil. However, that basically means you are tossing out completely good chocolate (oily chocolate… ick)… and in addition, I think it makes the chocolate look unrealistically melty. Instead, I recommend this trick… use a hairdryer on low (ideally with a diffusing attachment) to very lightly melt the surface of the chocolate. It won’t get rid of all of the blemishes, but it will do a pretty amazing job of evening out the surface enough that you can then use the clone tool in Photoshop to even out the rest. If you let the chocolate sit for just a minute or two after drying, the surface will become less shiny and look solid again. Be sure not to move anything during this time though, or you’ll end up with chocolate smears.
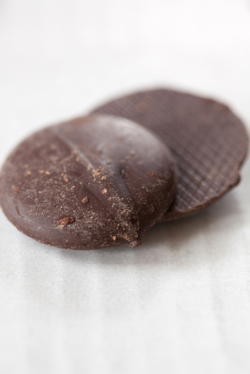
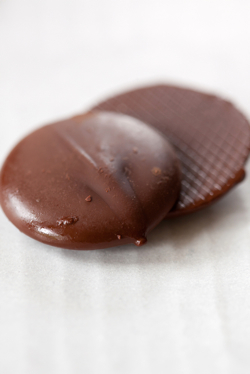
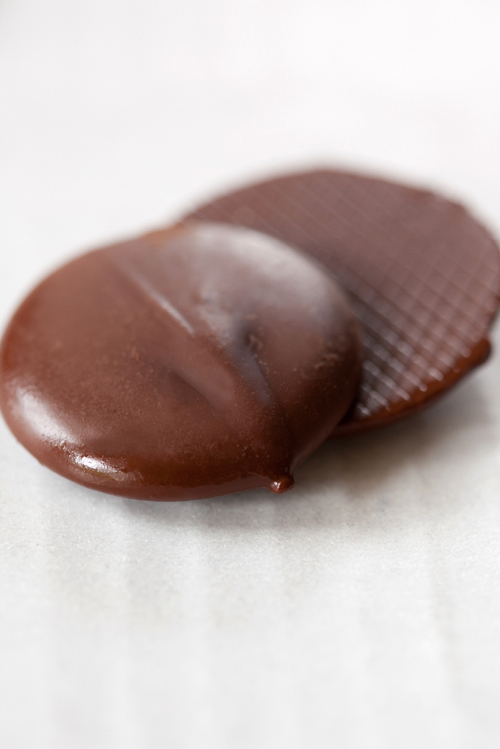
Here’s a shot from some melting drops I took this morning. The first image is straight out of the bag. The second is about a minute and a half after blow-drying, when the chocolate has firmed up somewhat. The final image is after fixing the small blemishes in Photoshop.


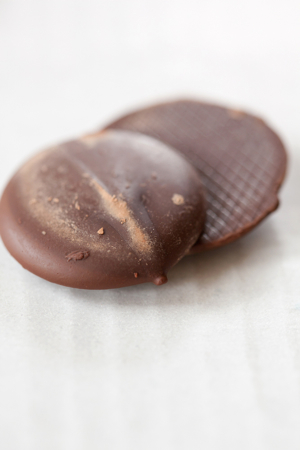
It’s important not to let the chocolate sit too long after warming it though or you’ll end up with even more serious bloom… here’s the same chocolates after sitting as long as it took me to write this post.

Gorgeous, this tip! Thank you so much!
At first glance, I thought this post was entitled “Soothing Chocolate Chips.” And I thought, why yes, they are.
Great tip!
Wow, how about that. That’s an amazing difference! Great tip.
Love this little tip. I had no idea how to make chocolate look so yummy. So informative! thank you!
And I love your blog! 🙂
What a great tip! Thank you Lara for sharing!
Ah, the diffuser. That’s what I didn’t use the last time I took the blow dryer to my food setup. You can imagine the mess that ensued.
Low speed is also super important if you have anything that can move around! There still will be some shifting though.
Great tip… I must remember the old blow -dryer next time things are looking a little off… the chip is camera ready after the heat!
Great tip, thanks for sharing!
I’ve reached the knowledge that freshly melted chocolate (not hardened yet) looks more appealing to the camera than the set one. But not always is possible to shoot the freshly chocolated cake 🙂
Ah, this is brilliant! I would have never thought of using a hairdryer.
Laura, what great advice. I find, most times, when I shoot chocolate chips in the background they tend to turn blue. would this trick help that?
It was so great meeting you in san francisco, however, there just wasn’t enough time to chat and explore. Do you ever visit Los Angeles? If so, I would love to get together! Love your blog, your photography, your writing! Thanks so much for all this wonderful info!
Great tip and great photos! Could you achieve the same effect if you put them in the microwave for like 5 seconds? just wondering.
Hey Laura,
You can get a heat gun at the hardware store that emits heat without blowing out too much air, and takes only a few seconds too! That was a tip from Delores Custer, works every time.
Love your blog!
whoops…meant Lara 😉
You have such excellent tips in your blog! I love the stunning photos. Thank you so much for sharing. 🙂